Soldering Notes:
If you’re new to soldering, we highly recommend reading through a good soldering tutorial, such as the ones by Adafruit and SparkFun.
We recommend using only lead-free solder and a good quality, temperature-controlled soldering iron set to 750F/400C.
When soldering, clean the soldering tip often. We recommend using a brass wire sponge. After cleaning, melt a small amount of solder onto the tip of the iron.
Using the high 750F/400C temperature should mean that you don’t need to heat the pads for more than a few seconds at at time. This allows you to work more quickly and avoid overheating and damaging the pads or any components.
If you’re having a hard time getting the solder to melt, check your temperature.
If the solder is sticking to the iron but not the pads, you may not be heating the pads long enough, but it should only take a few seconds. You can use soldering flux, which may help.
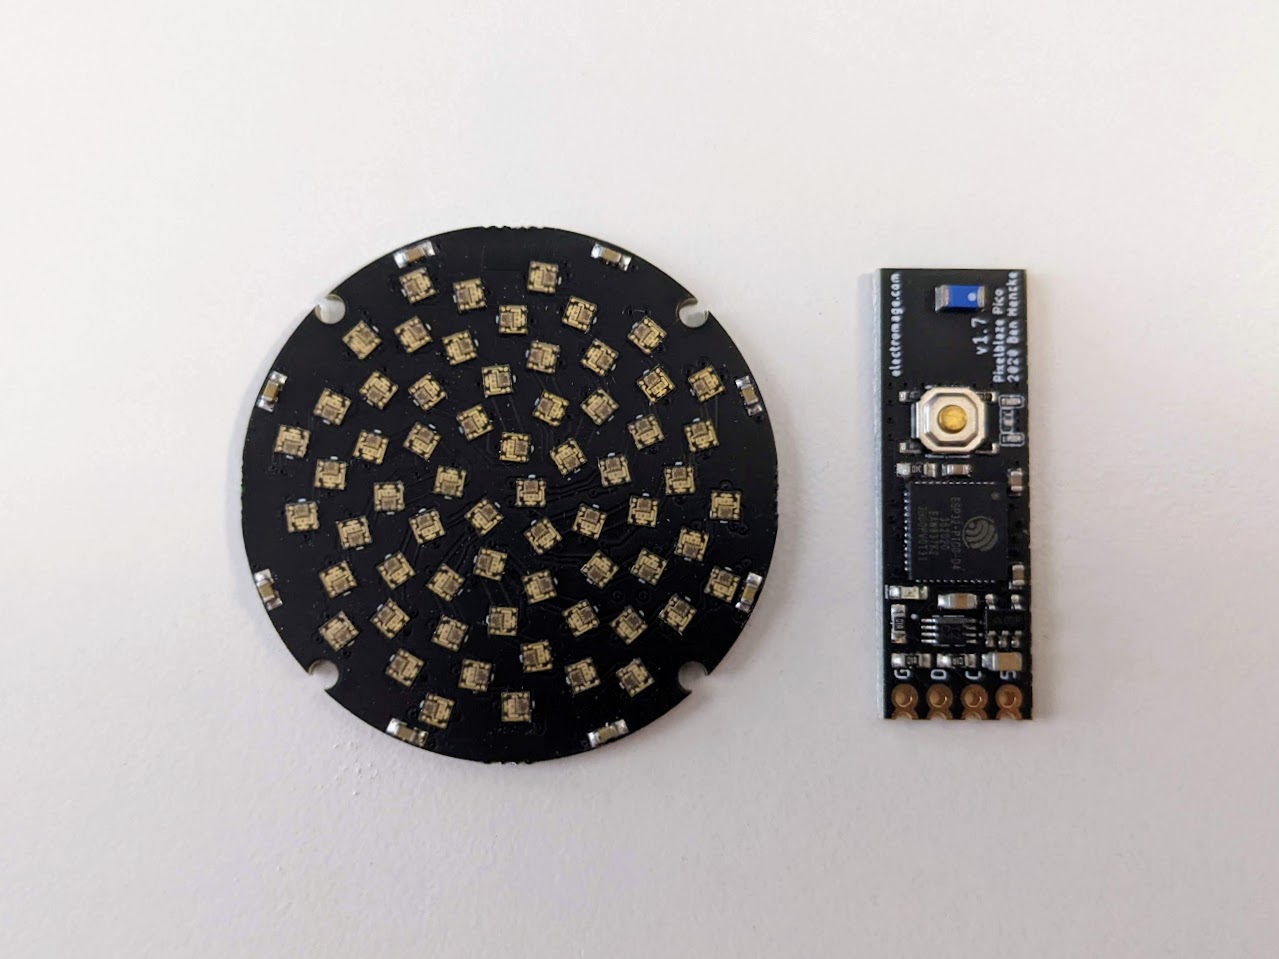
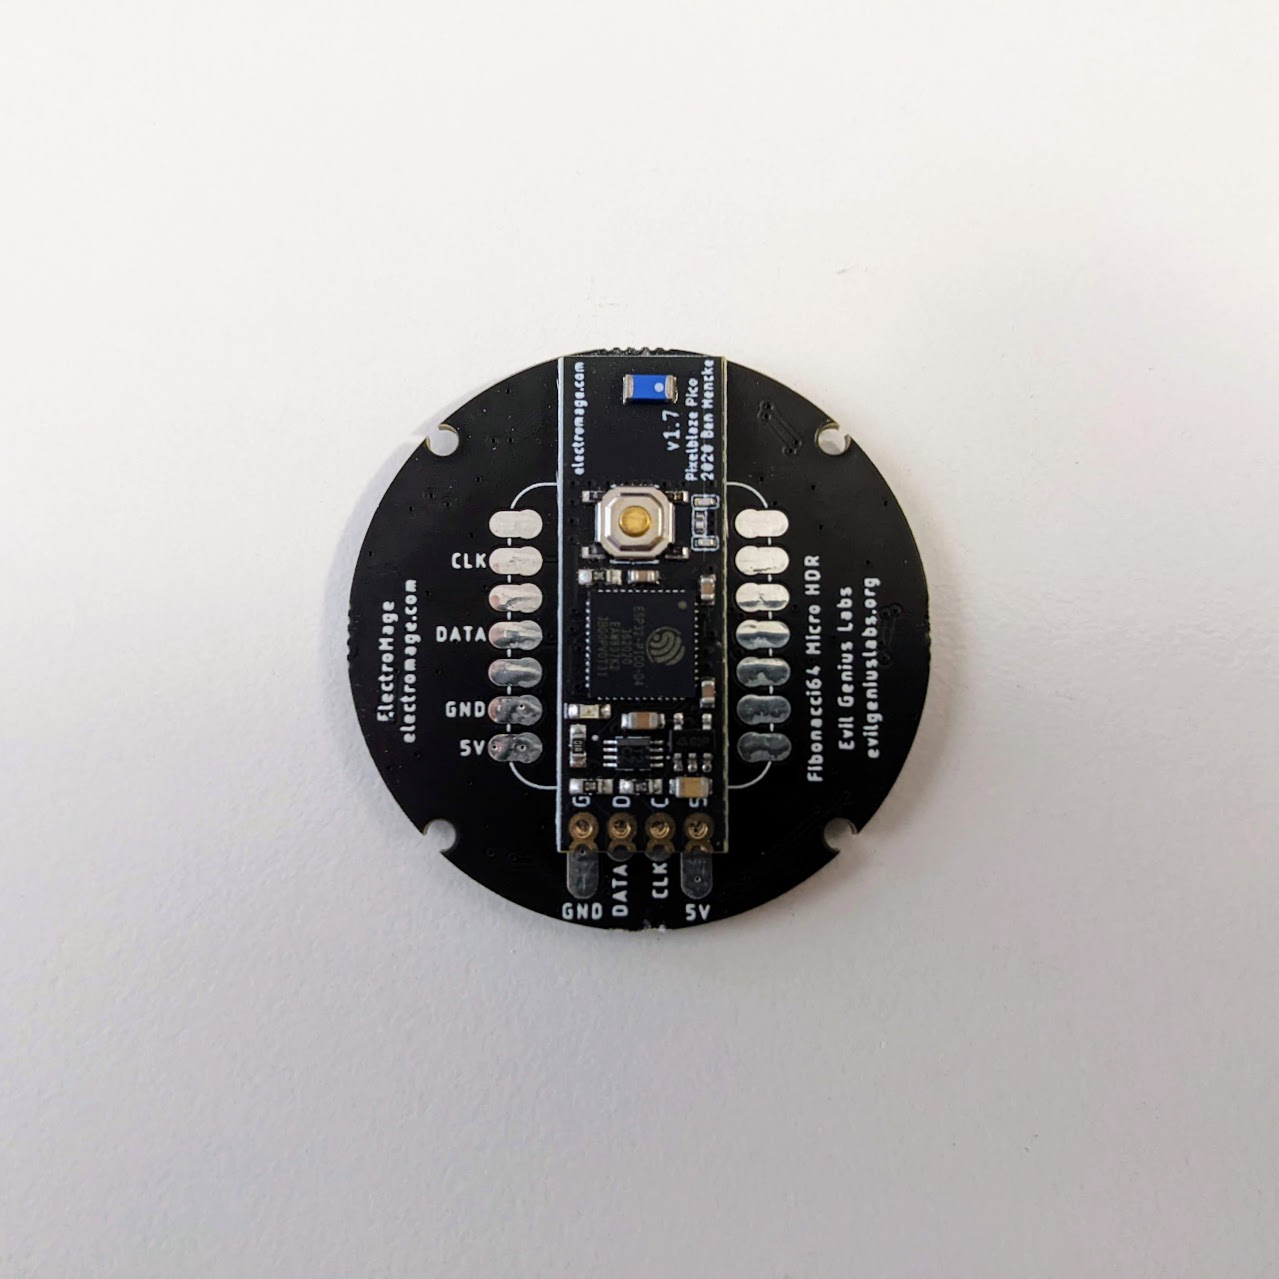
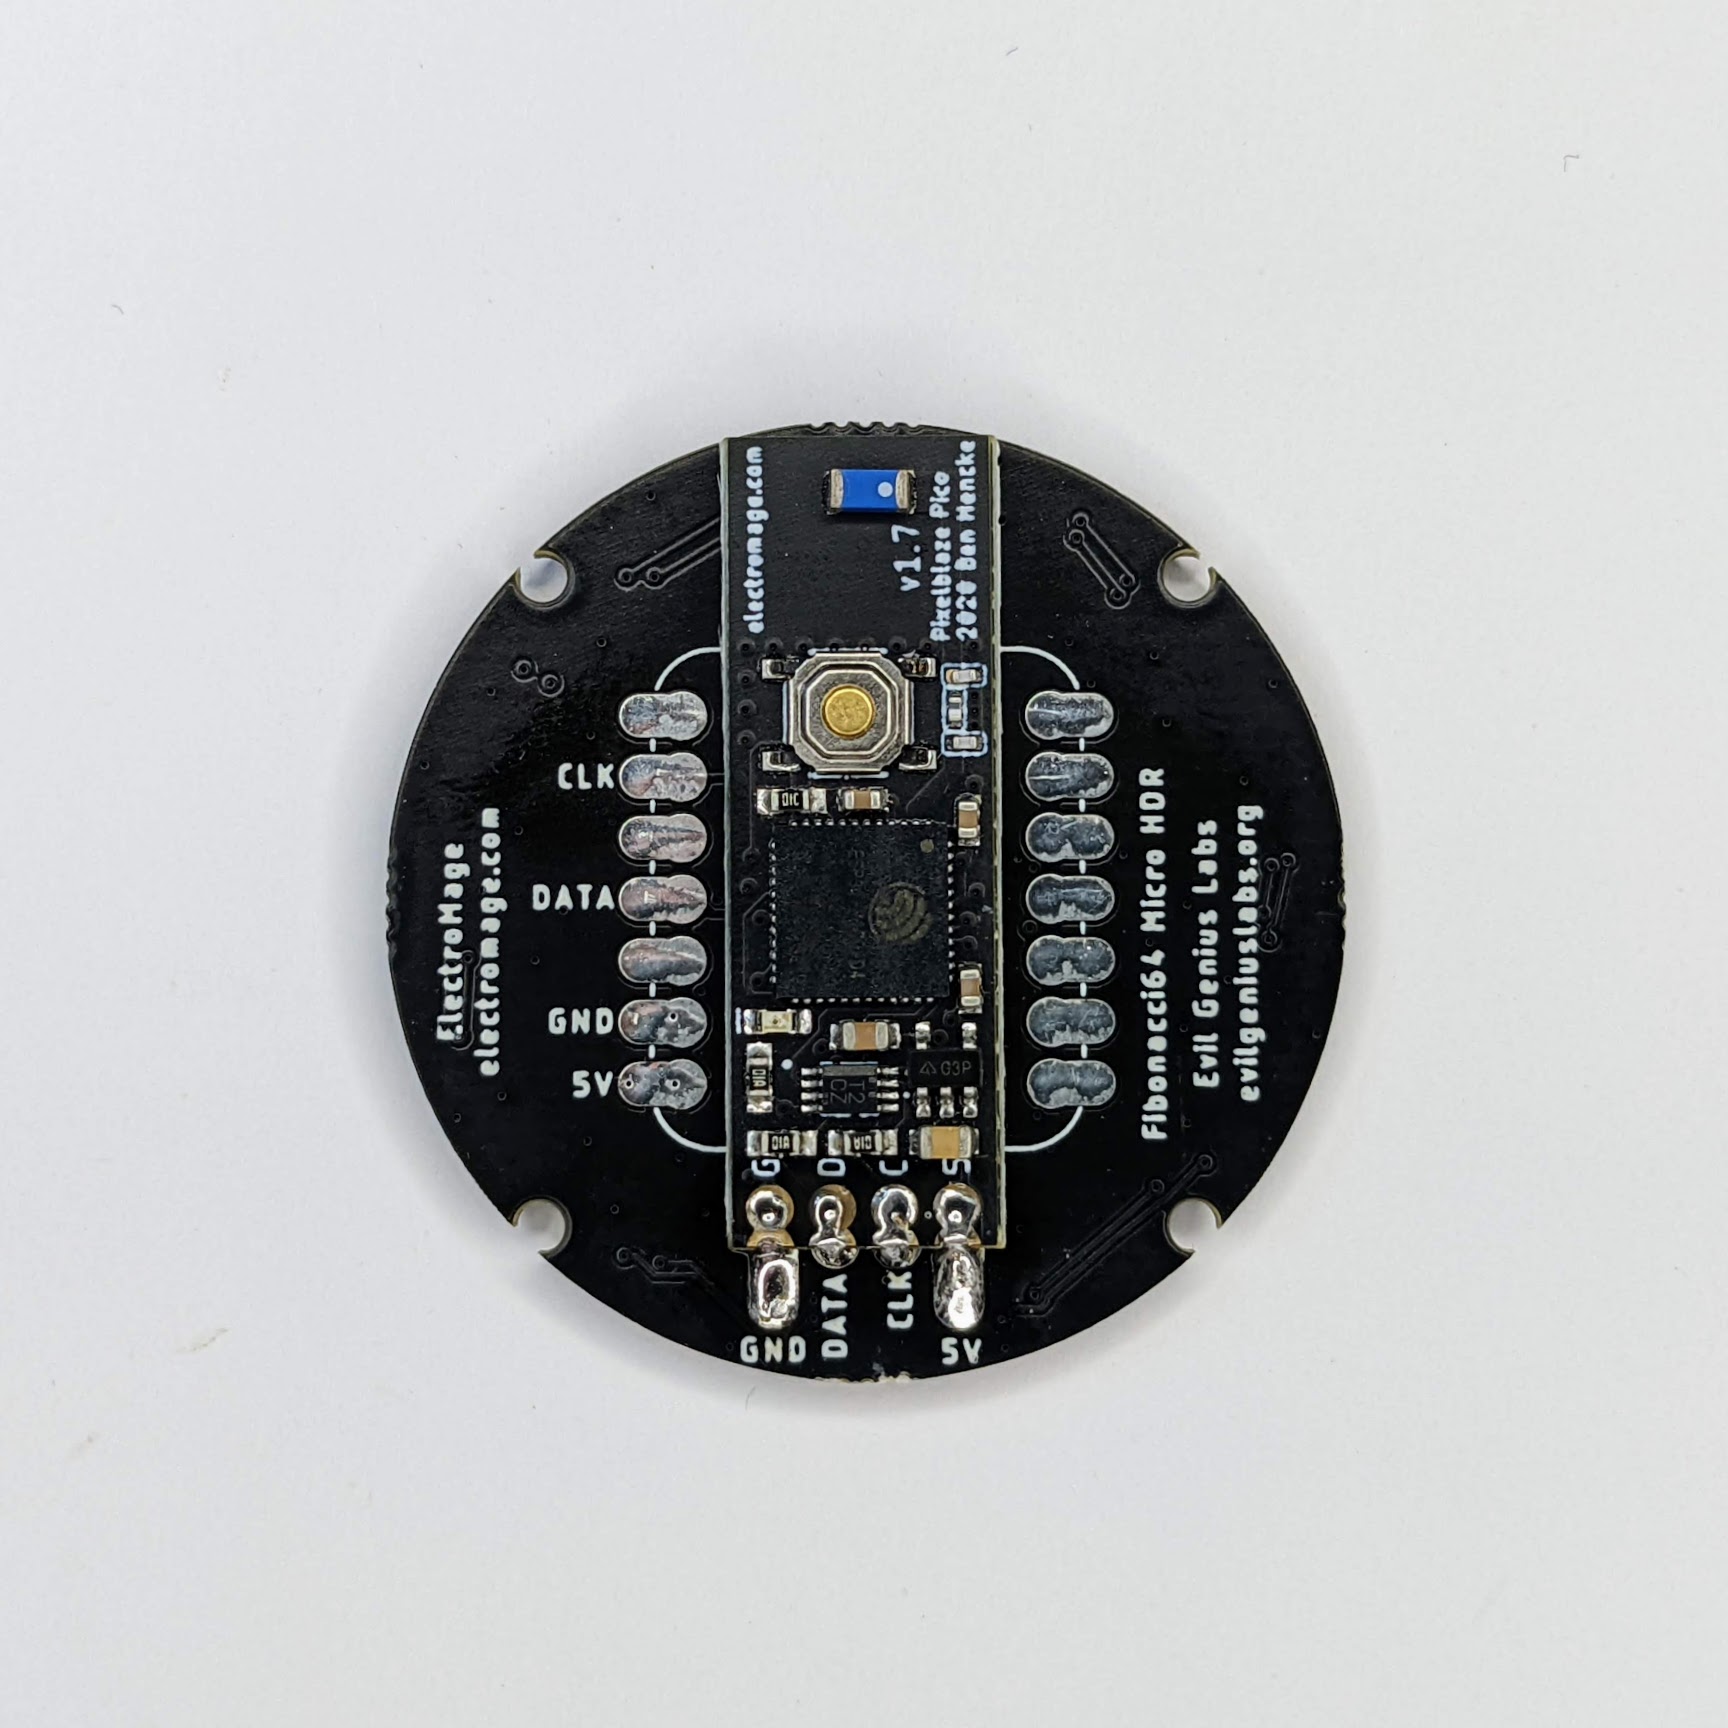
Soldering the Pixelblaze Pico onto the back of the Fibonacci64 Micro HDR board:
-
Note where and how the Pixelblaze Pico aligns with the outline on the back of the Fibonacci board, and how the contacts line up.
-
Tin the 5V pad by melting a blob of solder onto it.

-
Carefully align the Pico with the outline and contacts on the back of the Fibonacci board, and reheat the solder blob on the 5V pad, while holding both boards in place. Remove the soldering iron, wait for the solder blob to cool.
Check the alignment. If it’s not centered, reheat the solder blob, re-align it, and repeat as necessary until it’s aligned correctly.
Ensure the end of the Pico does not extend past the edge of the Fibonacci board!
-
Once again, check the alignment. Do not proceed until it’s aligned correctly. See the step above if it’s not.
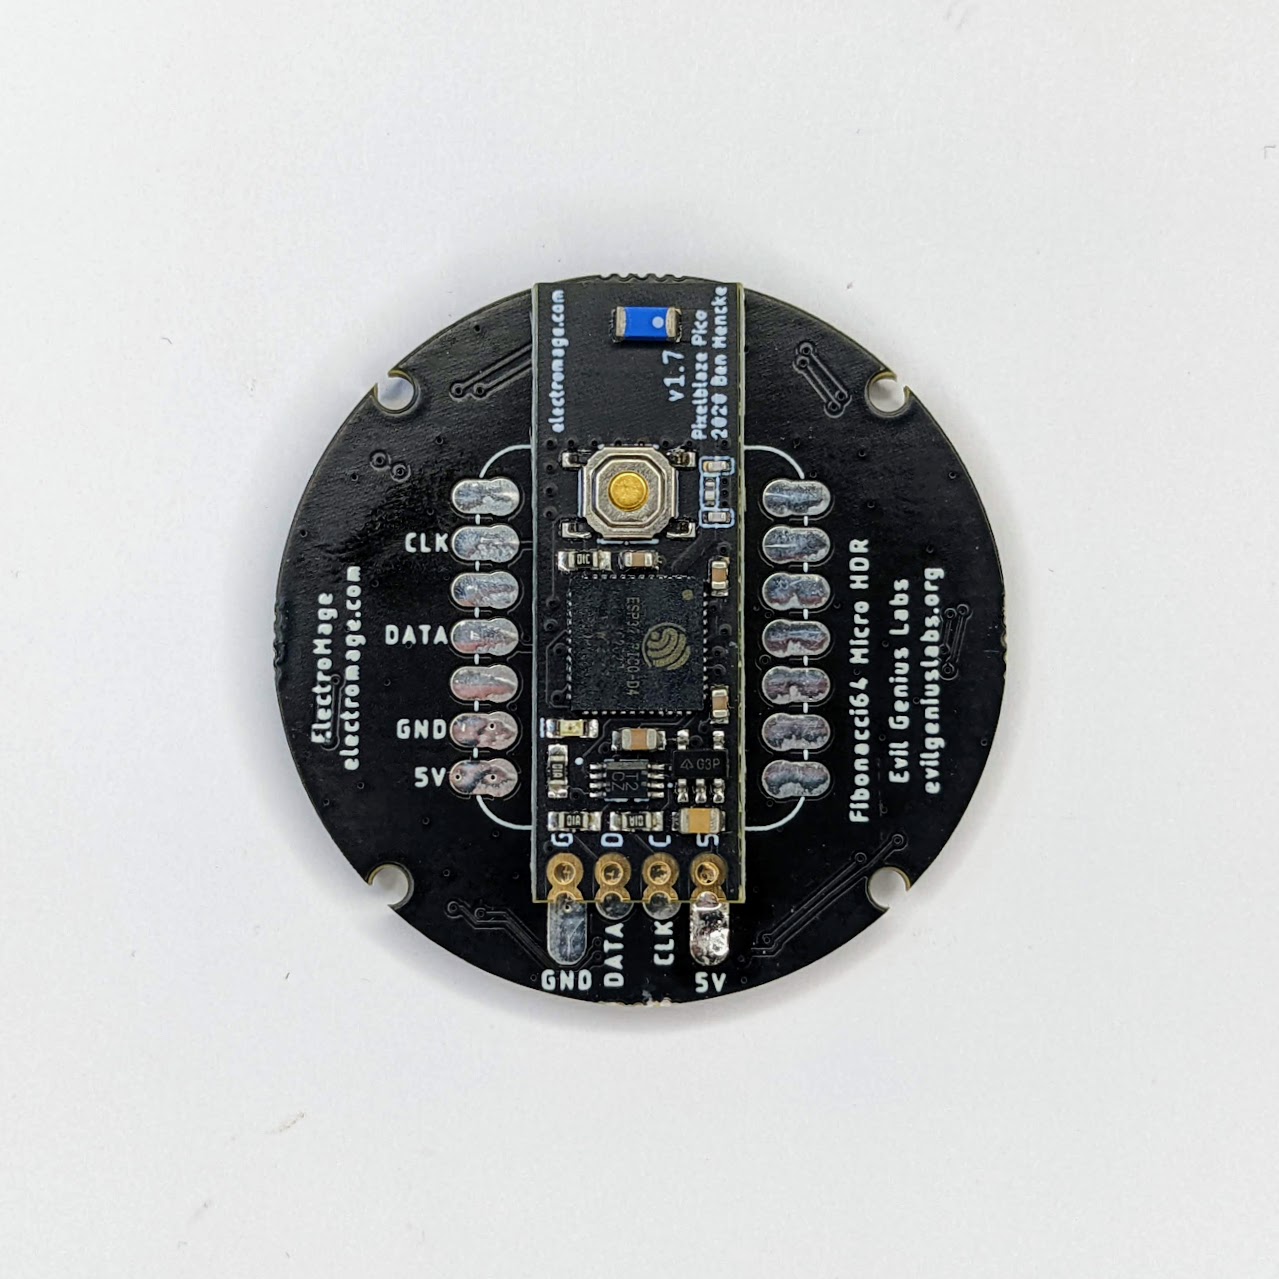
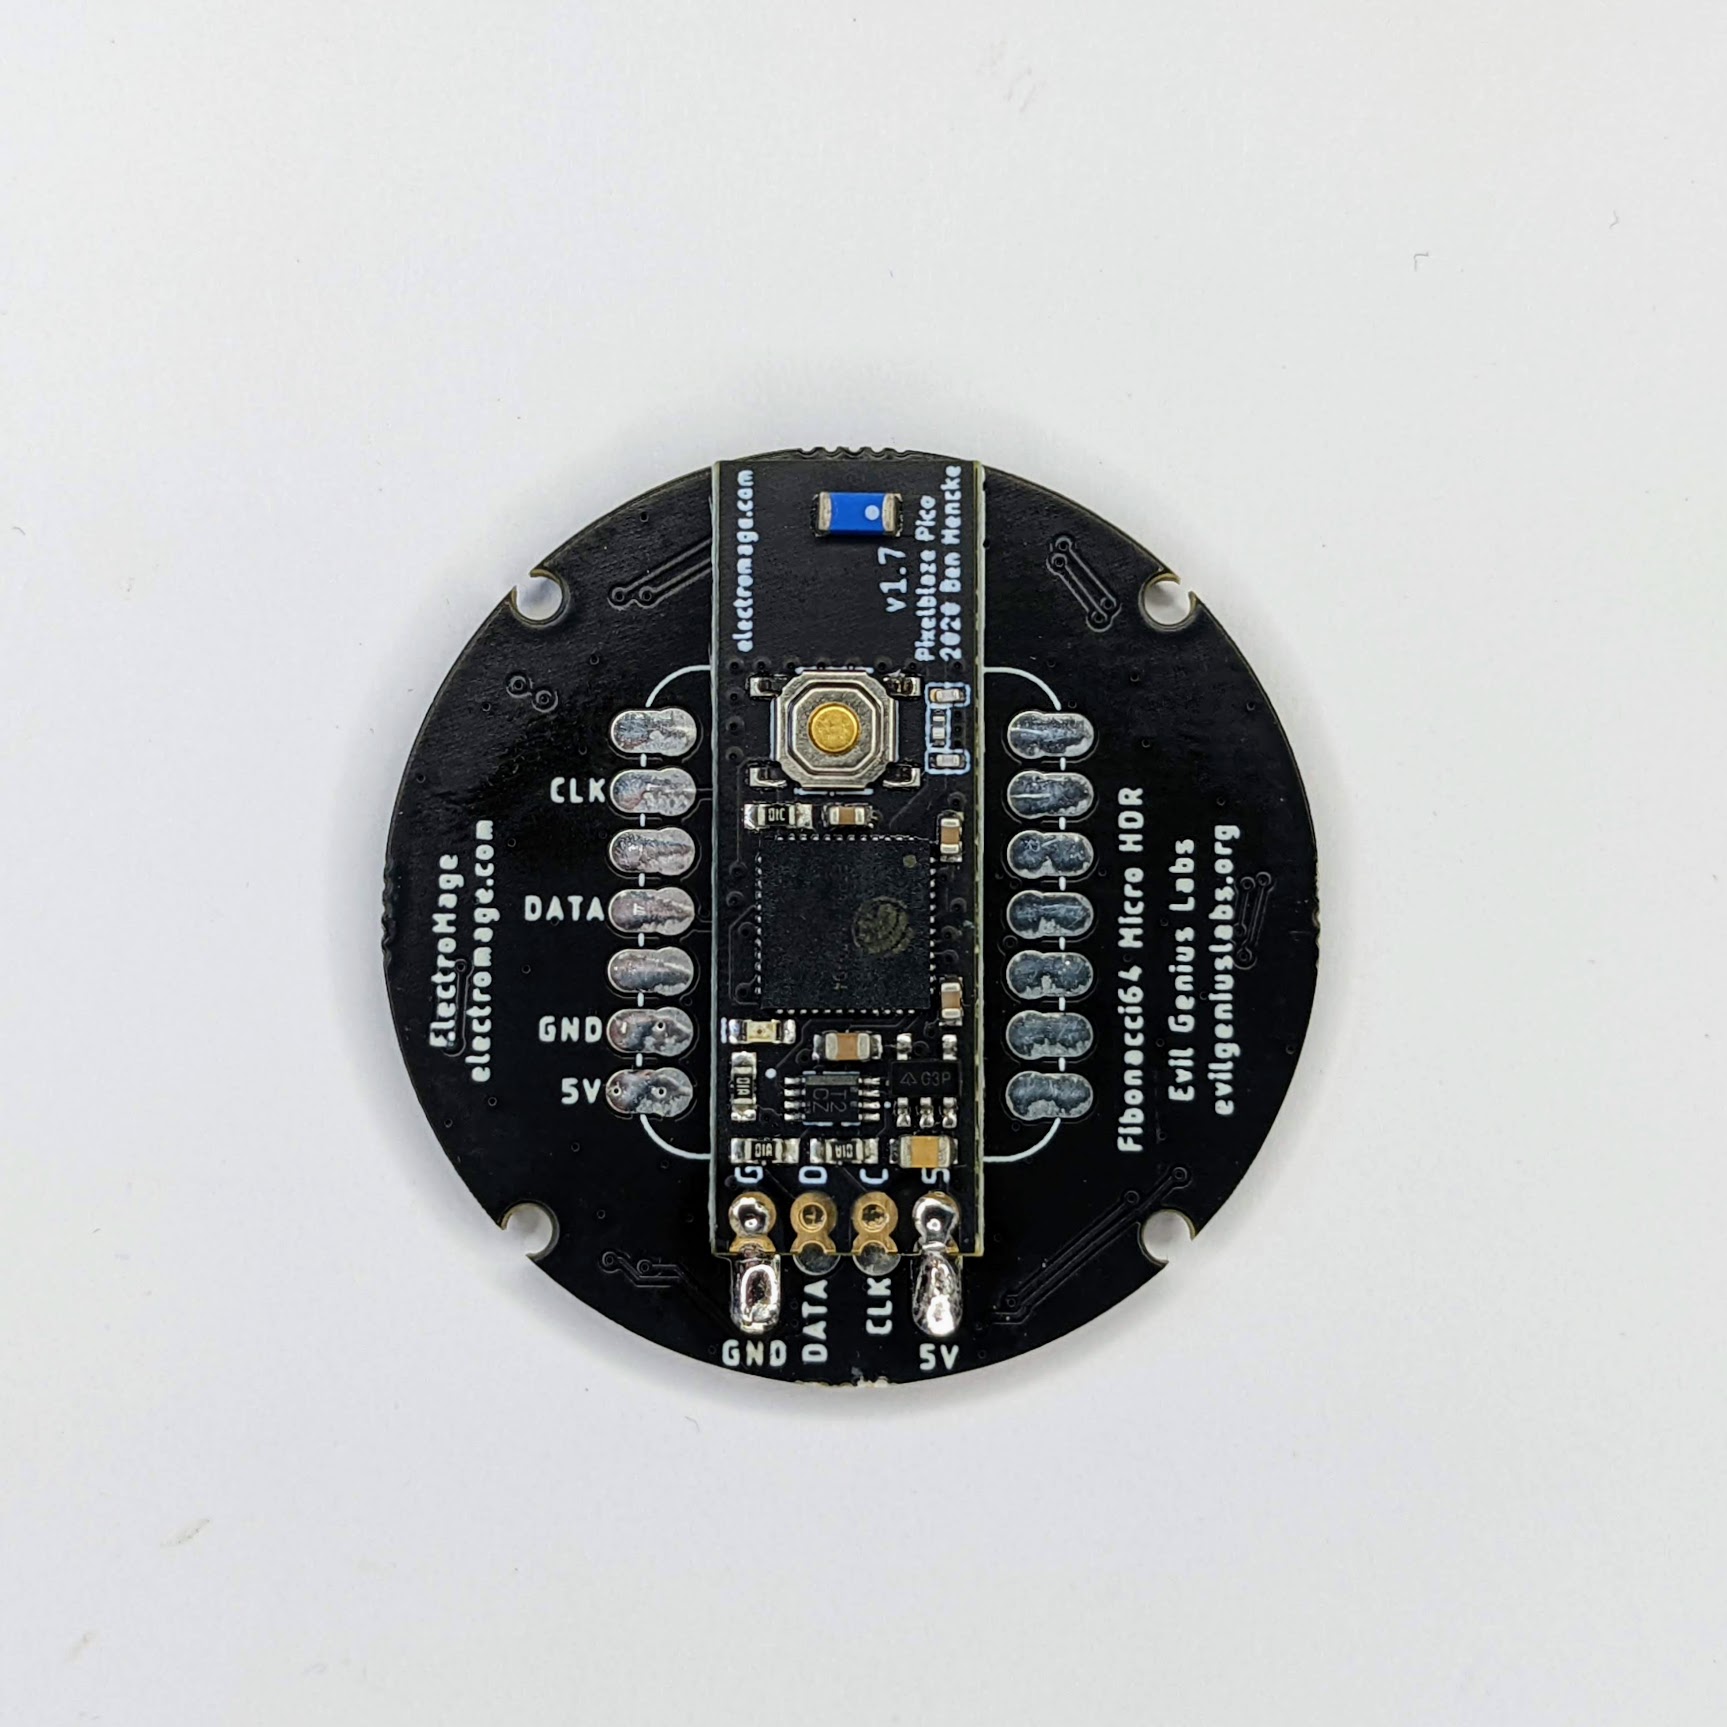
Solder the GND pad. Make sure you get a nice smooth fillet of solder on the pads. Use plenty of solder on the pad, then inside the pin header hole.
-
Repeat for the Data, CLK, and 5V pads, making sure to use plenty of solder. Ensure there are no bridged connections between the pads.
-
Clean up any flux on the PCBs and contacts with isopropyl alcohol, especially if you didn’t use solder with no-clean flux.